Make Your Own Bookcase At Home
A bookcase is a crucial element when it comes to keeping order and enjoying the walls of the house. That’s why, nowadays, people are increasingly encouraged to make their shelves more beautiful and creative.
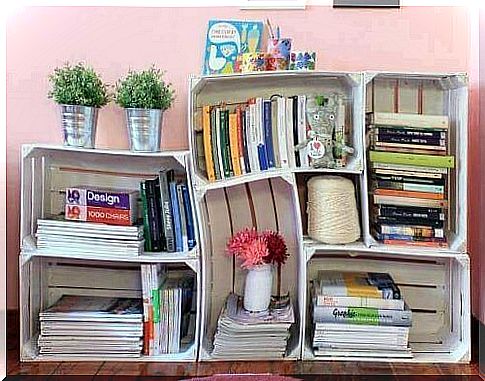
Often the options for organizing our home are few compared to the amount of objects we store. That’s why any piece of furniture (or structure) that allows us to be more organized while occupying less space will always be welcome.
Once we designate the place to store the books, we have to keep in mind how we like to see them. Shall we organize them by color, alphabetical order, size, edition, gender? Are we going to leave them horizontally or do we prefer to display them vertically?
A good bookcase is ideal for fulfilling the purpose of organizing our books in a pleasant and useful way.
In fact, these shelves allow us to add some objects, to accompany our books and beautify the space. From vases to small ornamental objects.
A bookcase, many styles
First, a bookcase consists of superimposing fixed elements on the wall, which allow you to place various objects on them. Of course, your style and form of crafting will depend on the materials you will be working with.
So, in this article, we present 2 styles of bookcases whose designs allow you to save a lot of space in your home.
1. Classic bookcase

This type of bookcase is very simple but highly functional. An example of a classic bookcase is one made with brackets. For its execution, you will need:
Materials:
- 1 drill.
- screws
- 1 ruler or measuring tape.
- One bushing pack (the width of the screws to be used).
- 1 pair of brackets (can be used wood or metal).
- A wooden board 15 cm deep and 1 meter long.
Instructions:
- First, choose the wall on which you will place the shelf.
- Next, mark the measurements in which you would like to place the bookcase. For this, use the measuring tape or ruler. Make sure the marks are equidistant.
- Later, with a pencil, mark the position of the brackets on the wall, taking the opportunity to mark the position where you are going to screw.
- Now, at the marks where the brackets will be screwed, open the respective holes with the drill. Then insert the plugs and place the brackets by screwing them into the wall.
- Finally, check your stability and position. If that’s correct, just place the wooden board over them and that’s it.
- Finally, you already have your bookcase installed (if you want more, just repeat the procedure as many times as you need).
2. Floating bookcase

First of all, you should know that this style of bookcase has invisible or hidden supports in plain sight. Of course, this will give the impression that it will float “in the air” on the wall; allowing for a considerably greater feeling of spaciousness.
To prepare this type of shelf, you will need:
Materials:
- Pencil
- Brush
- Piercer
- White paint
- White glue
- 12 4 cm nails
- 1 ruler or measuring tape.
- 8 long screws (6 cm).
- 1 strip of wood 1 meter long and 4 cm x 4 cm thick (mark as #1).
- A wooden board 1 meter long, 15 cm deep and 2 cm thick (mark #2).
- 1 strip of wood 1.04 m long, 4 cm deep and 2 cm thick (marked #3).
- 2 wooden slats 15 cm long, 4 cm deep and 2 cm thick (marked #4 and #5).
Instructions:
- First, organize the materials and proceed to select the wall you will use for support.
- Then mark the position and height of the shelf on it. To do this, place the shelf marked #1, which will serve as a support rail for the bookcase.
- Afterwards, on the line, make 4 marks, each one with 25 cm as an indication of where you will screw to the wall.
- On the other hand, take board #2 and place slats #4 and #5 at its ends, apply white glue on one side and join them on top of board #1, then secure with 3 nails at a distance of 5 cm each. .
- Right after that, take board #3 and place it on the front edge of board #2, repeating the same procedure on the sides, but this time the nails will be at a distance of 20 cm between them.
- Now it’s time to take the brush and paint it white on all sides, also paint the #1 board that will serve as a rail.
- Afterwards, with the drill, drill the holes in the wall and in the board #1 and proceed to fix it to the wall with the dowels and screws.
- Once you have done this, fix board 2 with its edges by screwing it into 4 points at a distance of 20 cm each. And it’s ready!